
If you’ve had your air conditioner for quite a long time, there is a good chance that it needs to be cleaned but the hard truth is that most people don’t even know how to clean an air conditioner vent. Most people often don’t realize just how dirty an air conditioner gets over time, especially with extensive use.
One of the main reasons why people should clean their air conditioner vents is if they have allergies. A dirty air vent could attract all sorts of mold, dust, and other small contaminants such as pet hair. When these contaminants have made it into the vents, the chances of the air having a negative impact on a person’s breathing greatly increases.
It isn’t just the air quality that drops when your air conditioner is not regularly cleaned. An air conditioner that has dirty vents is less efficient. The lower the efficiency of the unit means that it is more difficult for the unit to cool your home. In fact, the additional energy required to cool the home and keep it cool ends up being reflected in your energy bills.
How to Tell When a Vent Needs Cleaning
There are certain signs that reveal when your air conditioner vent needs to be cleaned. The first thing that you should check is the filter. If your filter is blowing dirty air through the ducts, then replace it and see how the air flow is; if the air flow is still negatively affected, you’re going to need to clean your vents.
When you turn on your air conditioner unit, there are some noticeable things that inform you that it is time to clean the vent. For example, if you hear any strange noises when the air conditioner is blowing, it could indicate that there is a blockage, which means that the vents need to be cleaned and the blockage removed. Another sign that your air vent needs cleaning is if when your air conditioner unit starts up, there is a puff of dust that appears as soon as the motor starts.
Preparing Your AC Unit
If you’re going to clean your air conditioner unit, the first thing that you should do is turn off the unit and ensure that there is no chance of it turning on. It is recommended to turn the unit off at the breaker.
Vacuuming and Removing the Vent Cover
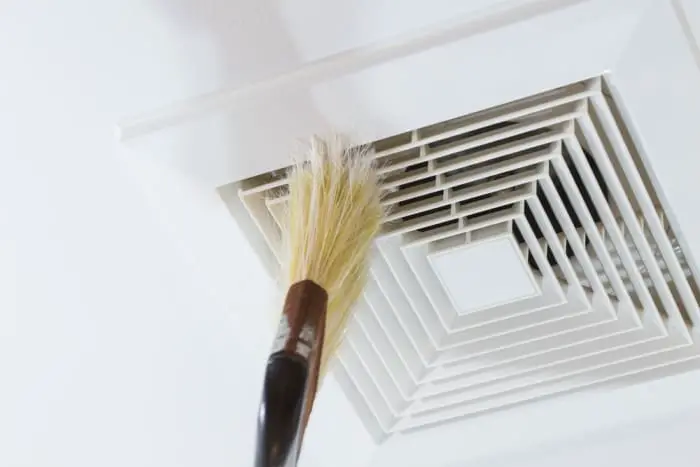
The majority of the cleaning that needs to be done on your air conditioner unit is through the vent cover. Before you even remove the vent cover, you should vacuum any dust and debris around and inside the cover. Try to be as thorough as possible through this step. If you have allergies, make sure to be careful during this process.
Once you’ve done a thorough job of cleaning the area around the vent cover slats, remove the vent cover away from the wall. You’re more than likely going to need a tool to remove the screws from the cover but some covers can be removed by just lifting or pressing a clip to release it.
Once the cover has been removed, the next step is to prepare a cleaning solution to soak the vent cover.
Cleaning the Vent Cover
The next step in cleaning the vent cover is to take the cover and set it in a sink or tub with a cleaning solution. You can use a specialty cleaner for your vent cover or use simple dish soap and water, depending on what you have available at the time. Make sure that the water is hot to help the cleaning be as thorough as possible.
Set the vent cover in the soapy hot water and have it soak for around a half an hour. The soaking process helps to loosen up any particularly stubborn pieces of grime and dirt so that they are easier to clean off later.
Once the soaking process is done, take the vent cover out of the water and begin scrubbing it on both sides using a cloth. Make sure that you pay special attention to the area between the slats and clean it using a small object such as a foam paintbrush or any device that allows you to get as thorough a clean as possible.
Finishing up the Cleaning Process
Once you’ve scrubbed the vent, give it a thorough rinse using clean water to get rid of any additional dirt and grime that may still be on the cover. After the cleaning is done, place the cover on a clean towel so that it is able to dry.
While the vent is drying, use a hairdryer or tool that blows cool air to help blow air into small crevices and any other areas on the vent where water may have collected. This process prevents your vent cover from rusting after it has been cleaned.
Once the cover has completely dried, the only thing left to do is reinstall it and turn your air conditioning unit on. You should notice a distinct difference in the performance of your air conditioner, especially if it has not been cleaned in a long time.
Important Things to Remember
When cleaning your vent cover, don’t use particularly harsh or powerful cleaners, such as those that use bleach. Abrasive cleaning solutions could damage the finish of your vent cover, especially if it is soaking for an extended period of time.
Another thing to keep in mind is that you should replace your air filter and do any other forms of maintenance that may be required in addition to cleaning your vent cover. Not replacing the filter or doing regular maintenance could lessen the increase in efficiency provided by the freshly cleaned vent cover.
If you are still experiencing issues with your air conditioner unit, such as it being more difficult to cool the home, there being strange sounds, or the air conditioner unit using more energy to cool the home, then you should consider calling a professional for air conditioner repair. There is a chance that your unit is damaged in a way that cannot be fixed through a standard air conditioner vent cleaning. And the truth of the matter is that if your air conditioner’s vent is dirty simply because you don’t know how to clean an air conditioner vent, then it will become less functional and you won’t get the full benefits of having an air conditioner in your home.